Hi my crafty friends, I am here today to share with you the card I made with the brand new, limited edition, exclusive die set designed by Tim Holtz for Simon Says Stamp Dash Away All. To get this die it is so easy. Purchase at least $25.00 of any Tim Holtz product and get this die set as a gift from Simon Says Stamp while supplies last. This is such a gorgeous die.

For the santa and sliegh die I wanted it all in black glitter so went with the Nightfall from the Sparkle set from Tim Holtz halloween release. I covered a small piece of card stock with collage medium matte and sprinkled on the glitter. Let it dry and cut out the die. I find this easier than covering it after I have die cut it. This way I don’t end up with bits of glitter hanging over the image. I inked up a 2nd piece of cardstock with hickory smoke and die cut the image out again. Glued it under the sparkle image but offsetting it a bit creating a bit of a highlight.

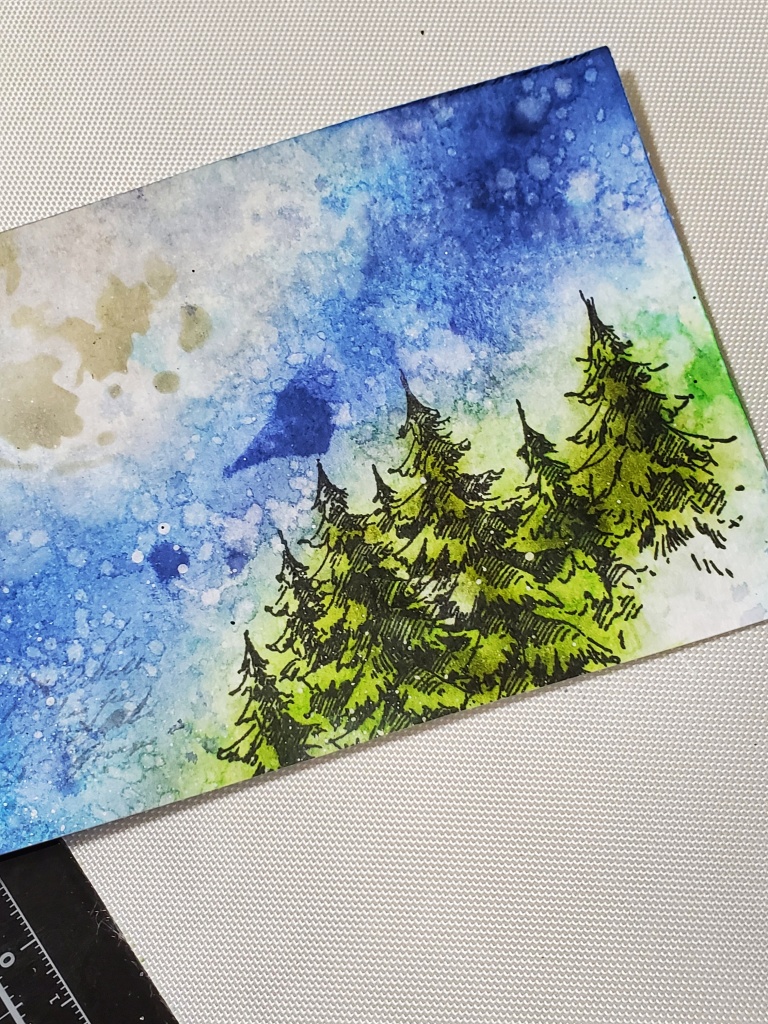
I stamped the trees from Tim Holtzs Stamptember 2021 set using black archival and for the background I used a blender brush and inked it up using salty ocean, prize ribbon and chipped sapphire, mixed ink and oxides. With the blender brush I was able to control where the ink went. I did still do it in layers. I would ink the panel spritz it with water and dry it using a heat tool and continue it till I got the look I wanted. For the trees I inked them with mowed lawn, peeled paint and a little bit of twisted citron. I did ink the ledger script CMS241 using 2nd generation inking but found it got lost in the background.


I used both pumince stone and antique linen for the moon. First I lightly inked up the area using the same technique of layering and drying in between layers. For the detail I again used the same colors and the moon stencil but went in with a heavy hand.

Using crackle paste and the beautiful THS132 sparkle stencil I inked up just a few stars here and there.

I chose the sentiment from the Stamptember 2021 set and embossed it with Brutus Monroe alabaster embossing powder and after with a fine tip marker highlighted the letters.

For the beautiful magical sparkle I die cut the panel using the star die included in the set and cut it out again using glitter cardstock. Put a sticky backing under the panel and layered the stars in. It didn’t take as long as you would think..lol

For the final part I cut down the panel and popped it up on fun foam, roughed up the edges a little and used Neenah lb cardstock for the cardbase.

I hope you like my step by step. You can find links to the supplies I’ve used below: click on the picture and it will take you directly to the product. If purchased through the link provided I will receive a small commission at no extra cost to you. I truly appreciate all your amazing support. Looking forward to sharing many more projects and techniques including my favorite .. mixed media.
 https://linkdeli.com/widget.js?id=f5e8378456858c916708
Thank you so much for taking the time to stop by today. Hope you will subscribe to my blog for future posts. See you again soon with another crafty project.
Kulbir
It is such a wonderful die and of course I had to order it! Your card is beautiful and showcases the die perfectly! Anne x
LikeLike
An amazing project and an excellent step by step.
LikeLike