Hello friends, were you able to check out Tim’s Stampers Anonymous release party? If not , click here and check out the amazing inspiration fromt Tim’s Makers. Tim also added some awesome tips and demos through the live which are a must see.
I am sharing the step by step on a card I made my son for his 19th birthday which isn’t till June 30th but he got his gift a little early this year:)
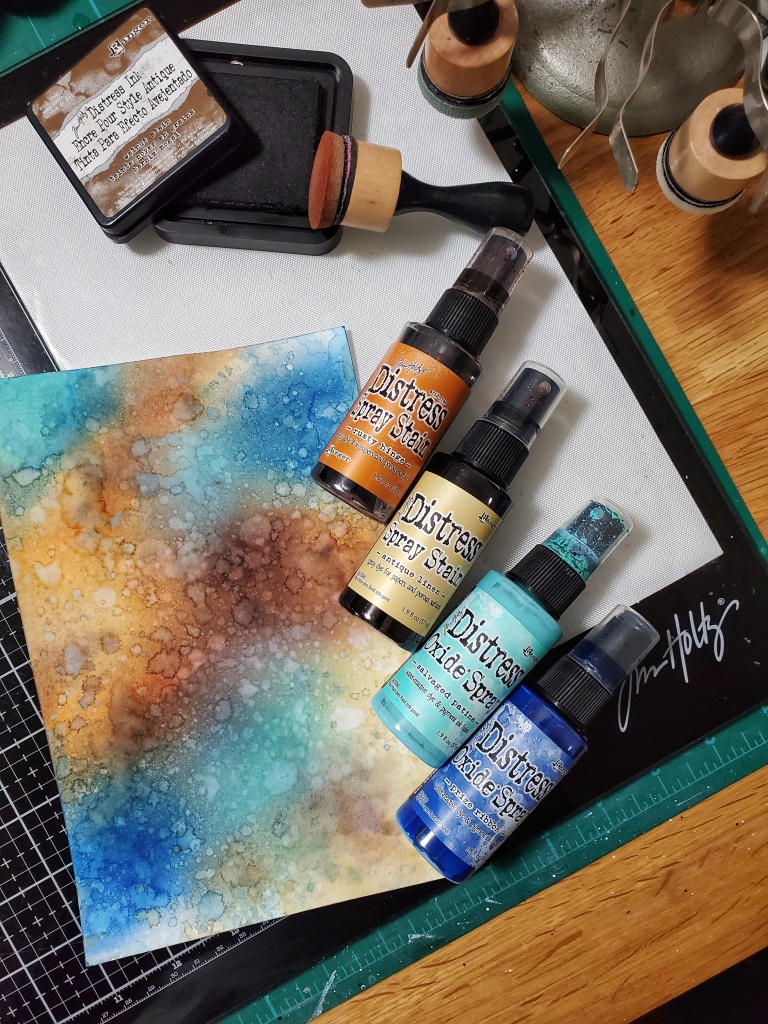
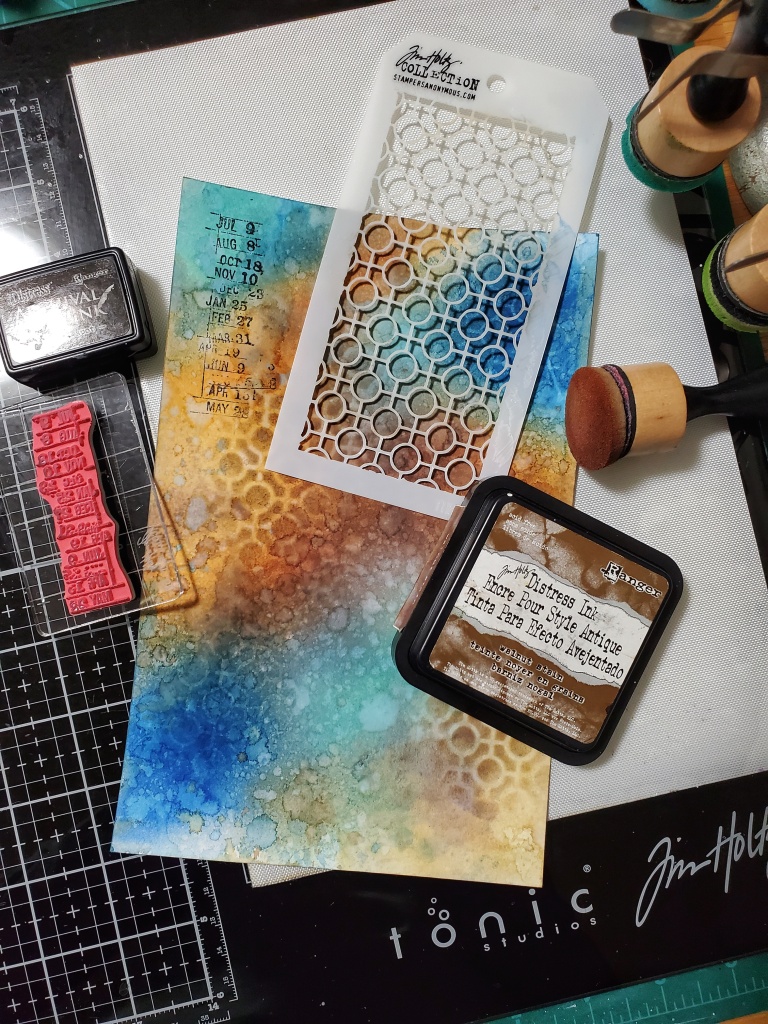
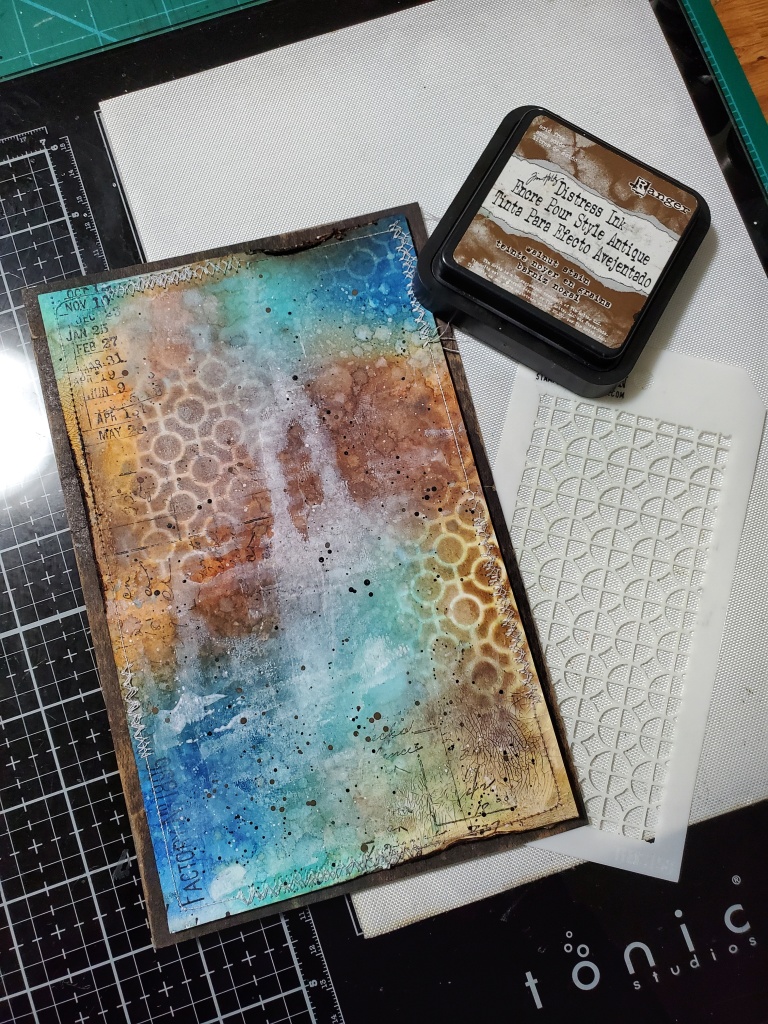
For my background I used rusty hinge, antique linen, salvaged patina and prize ribbon both in distress spray and oxide. Working in layers and drying in between. Using the linked circles stencil and walnut stain I added the pattern in some of the areas and than went in with black soot archival ink and stamped some of the images from Eccentric which I have to say is turning out to be one of my favourite sets :).
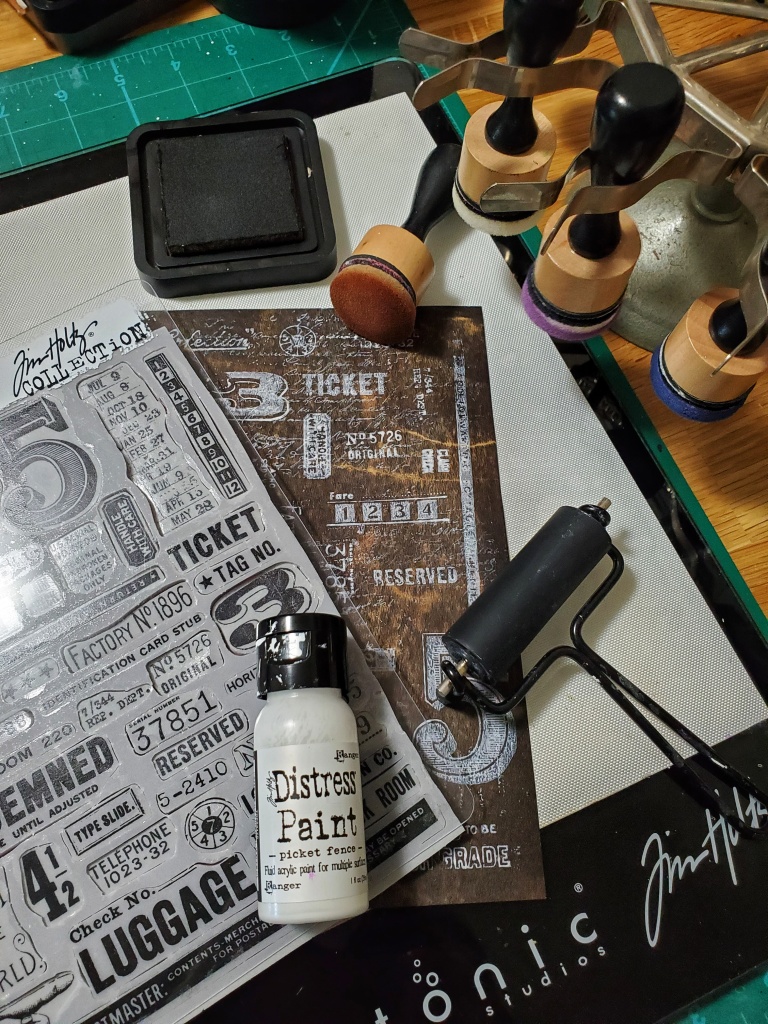
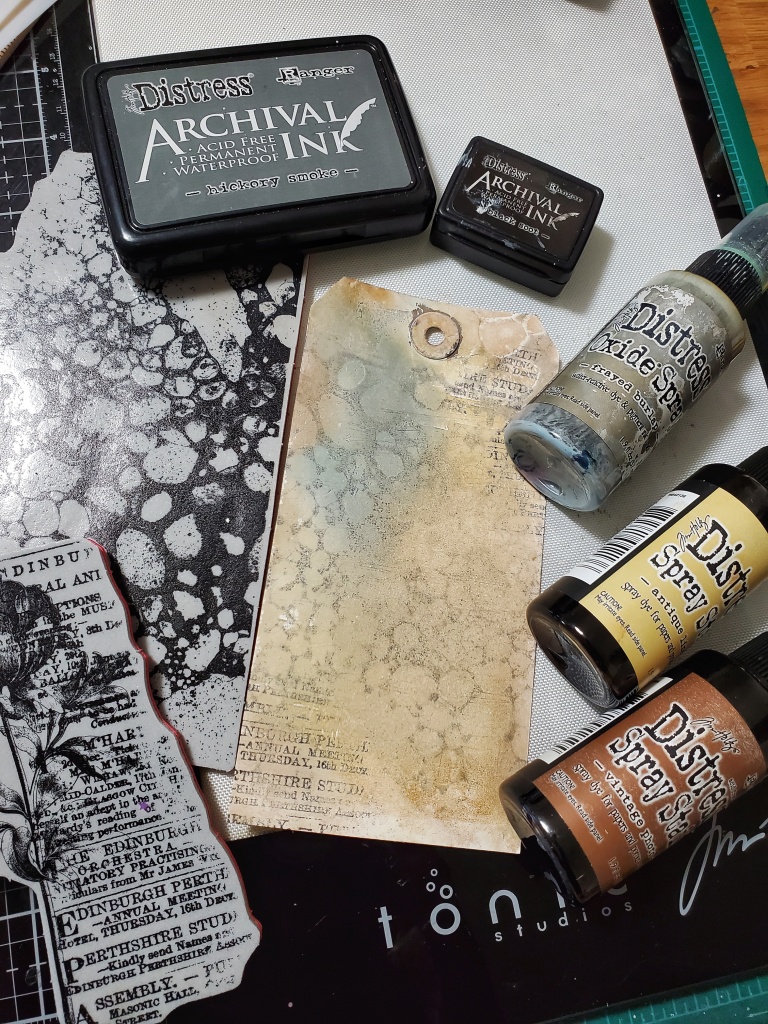
I sanded down black kraft stock and inked up the panel with a little bit of walnut stain. Using some of the stamps from Eccentric and layered them on my platform, inked them up using my brayer roller and picket fence distress paint. I only needed one word but decided to do enough to cover the panel , I am sure they will come in handy for later makes .
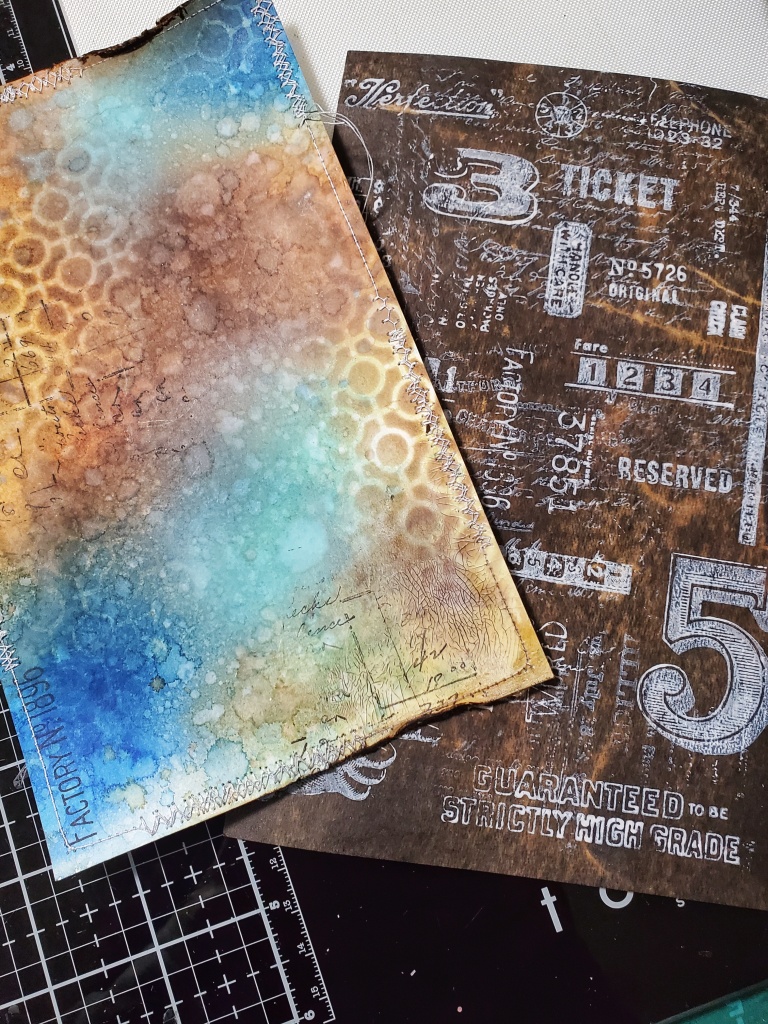
I pulled out my sewing maching and stitched around the panel , roughed up a couple of edges and inked them up with walnut stain. Popped up the panel on another distressed panel of black kraft stock. I had some distress paint left on my brayer and instead of wasting it I rolled it onto the panel. I added some translucent crackle paste around some of the edges and went over with walnut stain crayon.
I went over a number 8 tag with white gesso and using frayed burlap, antique linen and vintage photo inked up the background. I stamped the tag with Bubbles and Bontanic Collage with both hickory smoke and black archival ink. To finish it off I did add some splatters…are you surprised…lol

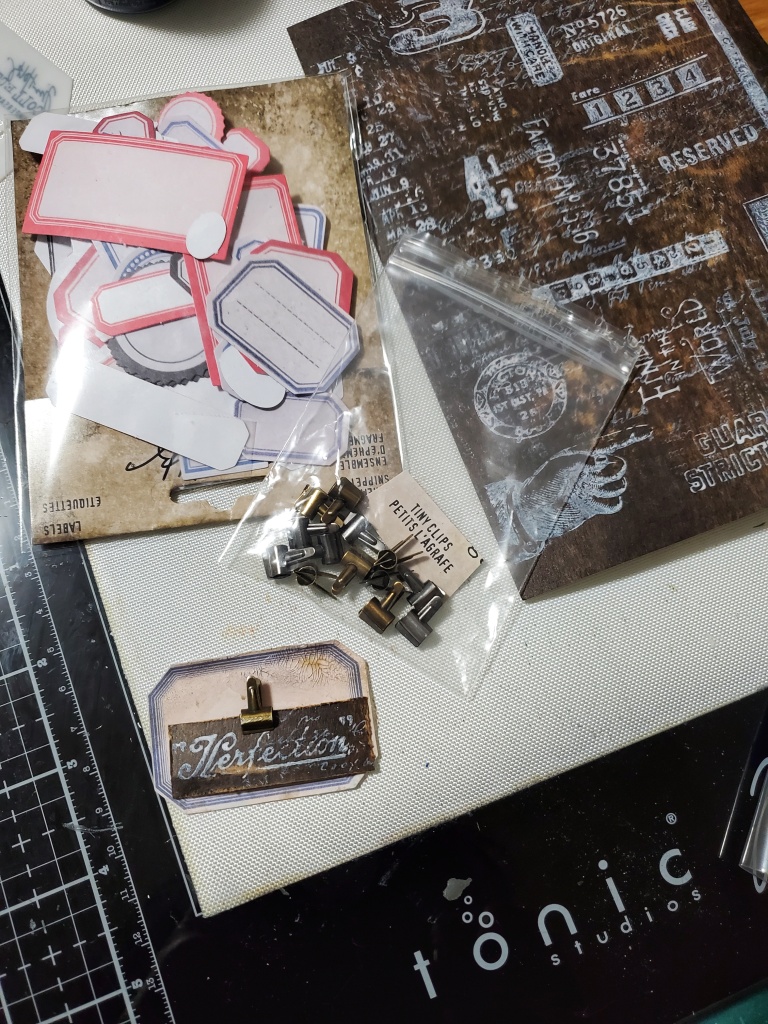
Using one of the snippets labels from Ideaology I added some translucent crackle paste to it and after it dried went over it with walnut stain crayon . From the panel I created from Eccentric I cut out the word perfection added it to the label and finished off with a mini clip. For the tag I struggled a little bit. I first used texture paste which I tinted with distress ink and added some prize ribbon glaze but when it dried I didn’t like how bright blue it was so I ended up adding some walnut stain distress glaze to darken it up a bit.

To finish off the card I popped up the tag and added a sentiment from Noteworthy. Justin was so happy with the card which is a win for me:).

Hope you like my step by step. You can find links to the supplies I’ve used below: click on the picture and it will take you directly to the product. If purchased through the link provided I will receive a small commission at no extra cost to you. I truly appreciate all your amazing support. Looking forward to sharing many more projects and techniques including my favorite .. mixed media.
 https://linkdeli.com/widget.js?id=f5e8378456858c916708
Thank you so much for taking the time to stop by today. Hope you will subscribe to my blog for future posts. See you again soon with another crafty make
Kulbir

AMAZING make Kulbir! Thank you for sharing
LikeLike
great card Kulbir, that background is just fabulous
LikeLike
WOW! Stunning! Your attention to detail is amazing! Thank you for your inspiration! Cheers, Makira
LikeLike